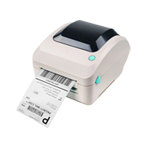
To set up an Arkscan label printer on a Chromebook to print shipping labels and product labels, follow these steps:
Create a folder: On your Chromebook, click the launcher button and type "Files" in the search bar. Click the "Files" icon and create a new folder to store the printer driver. Right-click on "My Files" and select "New folder," giving it a recognizable name like "Printer Driver."
Download the driver:
Open Chrome and go to www.arkscan.com.
Click on "Driver" and expand the Chromebook dropdown menu.
Download the driver file.
Install and setup the driver:
Connect the USB cable between the printer and the Chromebook, and turn on the printer.
Double-click the downloaded file to run the installer and follow the installation process.
The printer name "Arkscan 2054A" should appear under "Printers & Scanners."
Choose the stock (label size):
Go to "Printers & Scanners."
Select the printer name and click "Manage."
In "Printing Preferences," select "Page Setup" and then "Stock."
Choose "4x6" from the drop-down menu and apply the settings.
Print a sample label:
Print a 4x6" sample shipping label to confirm the printer works correctly.
Set the Page Size/Paper Size to 4x6" and Scale to "Fit to Printable Area" on the print preview popup.
A Detailed Instructions can be found in YouTube tutorial below: