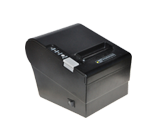
The Arkscan Printer Chrome extension supports label printing from the Chrome web browser on Mac, Chromebook, and Windows computers. To get started, please follow the video or written steps below:
*The Chrome Extension does not work with the USB connection on Windows. Please use the Windows Printer Driver instead.
*The Chrome Extension does not work with the USB connection on Windows. Please use the Windows Printer Driver instead.
Video Instructions: Chrome Arkscan Printer Extension Setup for USB
- Go to the Arkscan Printer extension page on the Chrome Web Store: https://chromewebstore.google.com/detail/arkscan-printer/hbfjkkhogmmeoimjkhnbgmnhngohaofe
Click on the "Add to Chrome" button to install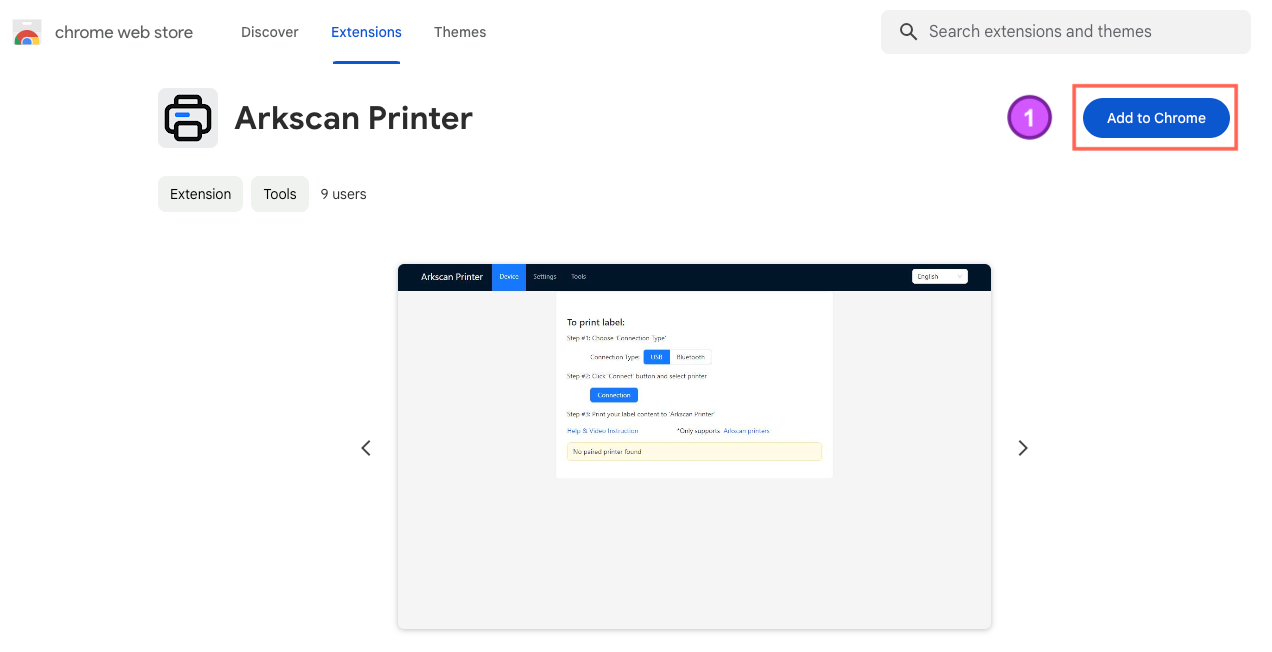
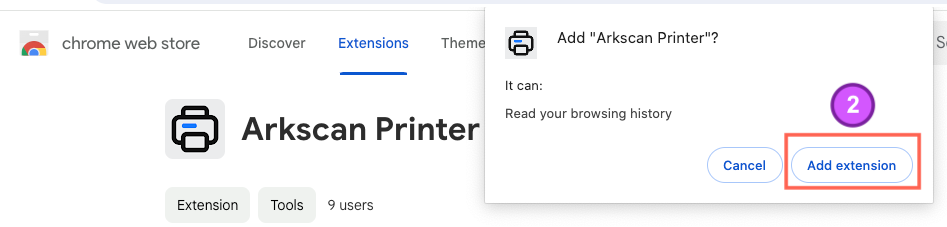
- Click "Add Extension" to confirm that you want to install the Arkscan Printer extension
- Click on the Plugins icon in the top corner of the Chrome browser
- Then click on the Arkscan Printer extension icon
NOTE: You may need to close the extension browser tab used for adding the extension. If it remains open, the following steps may not work.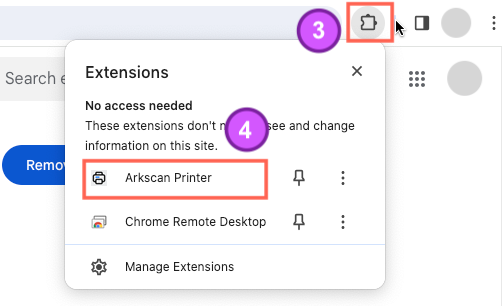
- Select your Connection Type: USB
- (make sure the printer is powered on, with a blue light on top, and plugged into the computer with a USB cable)
*For Bluetooth connection, please see the Bluetooth Setup tab above* - Click on the 'Connect' button
NOTE: If you do not see this screen after clicking on the plug-in, please close the extension browser tab used for adding the extension and then click the plug-in again.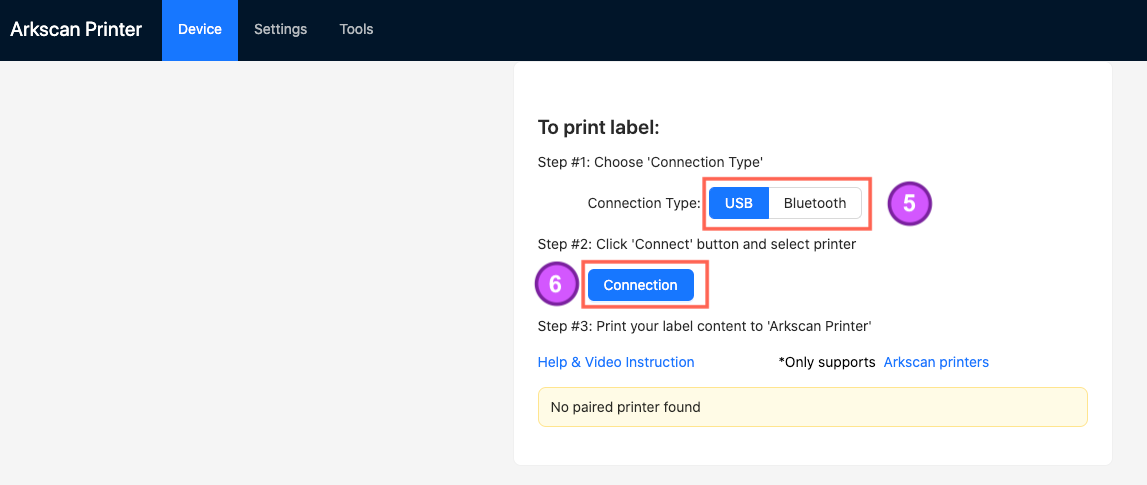
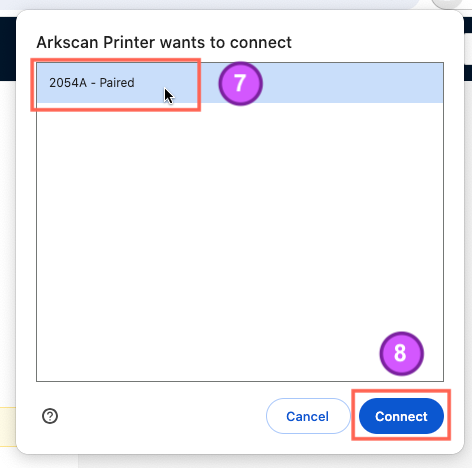
- When prompted click to highlight your Arkscan printer model
- Click 'Connect'
- A successful connection will be displayed at the bottom of the page:

The Arkscan Printer Chrome extension supports label printing from the Chrome web browser on Mac, Chromebook, and Windows computers. To get started, please follow the steps below:
- Go to the Arkscan Printer extension page on the Chrome Web Store: https://chromewebstore.google.com/detail/arkscan-printer/hbfjkkhogmmeoimjkhnbgmnhngohaofe
Click on the "Add to Chrome" button to install - Click "Add Extension" to confirm that you want to install the Arkscan Printer extension
- Click on the Plugins icon in the top corner of the Chrome browser
- Then click on the Arkscan Printer extension icon
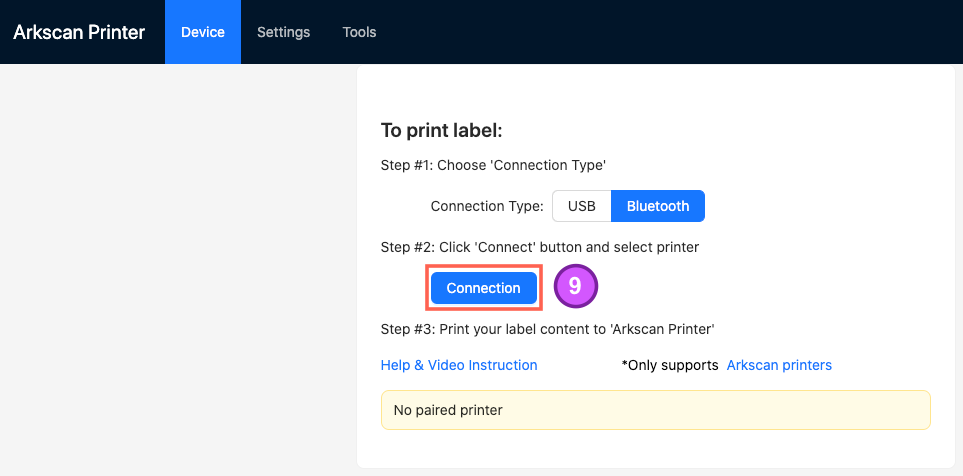
NOTE: You may need to close the extension browser tab used for adding the extension. If it remains open, the following steps may not work. - Select your Connection Type: Bluetooth
- (make sure the printer is powered on, with a blue light on top, and that your computer has Bluetooth turned on) - Click on 'i' icon, and then the 'To Enable' button
NOTE: If you do not see this screen after clicking on the plug-in, please close the extension browser tab used for adding the extension and then click the plug-in again.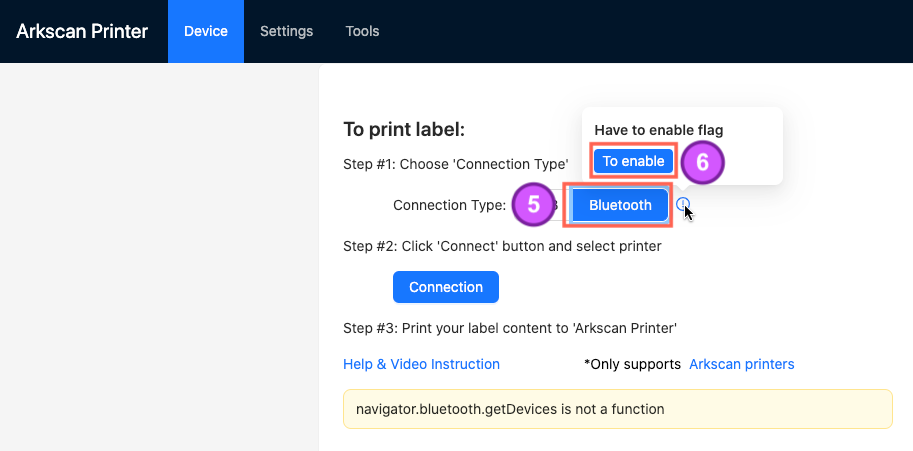
- Select 'Enabled' from the dropdown list
- And then click on the 'Relaunch' button at the bottom of the page, to restart the browser for the change to take effect


- Click on the 'Connect' button
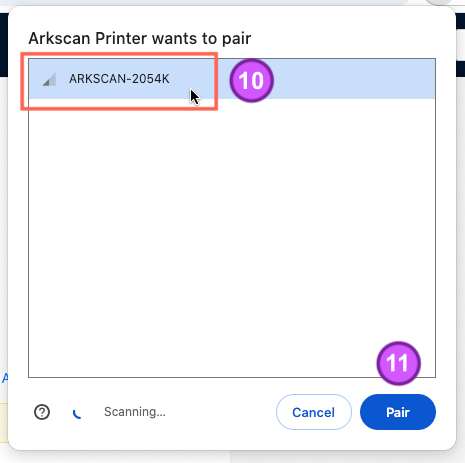
- When prompted click to highlight your Arkscan printer model
- Click 'Pair'
- A successful connection will be displayed at the bottom of the page:

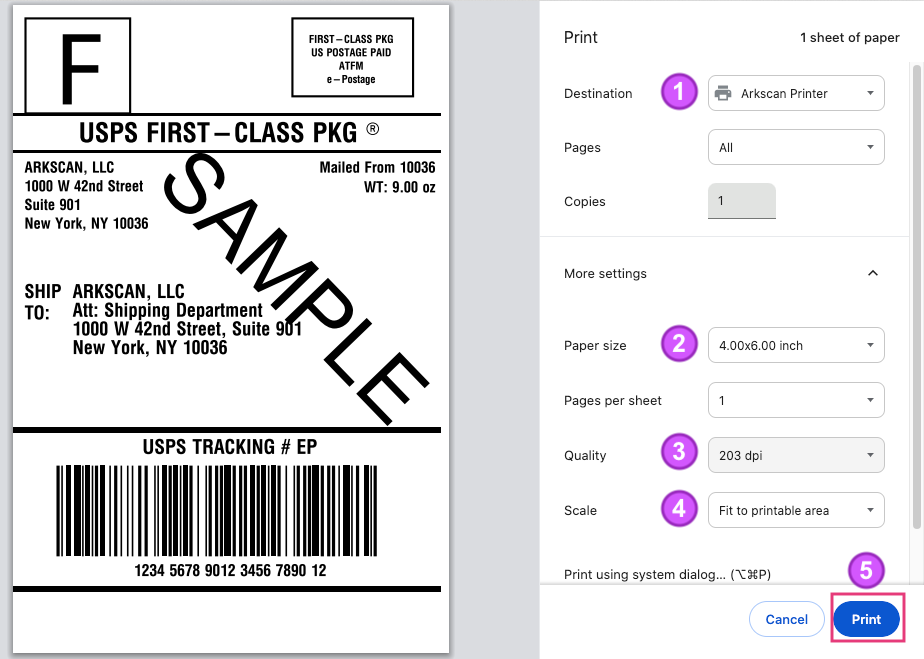
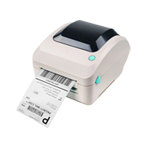
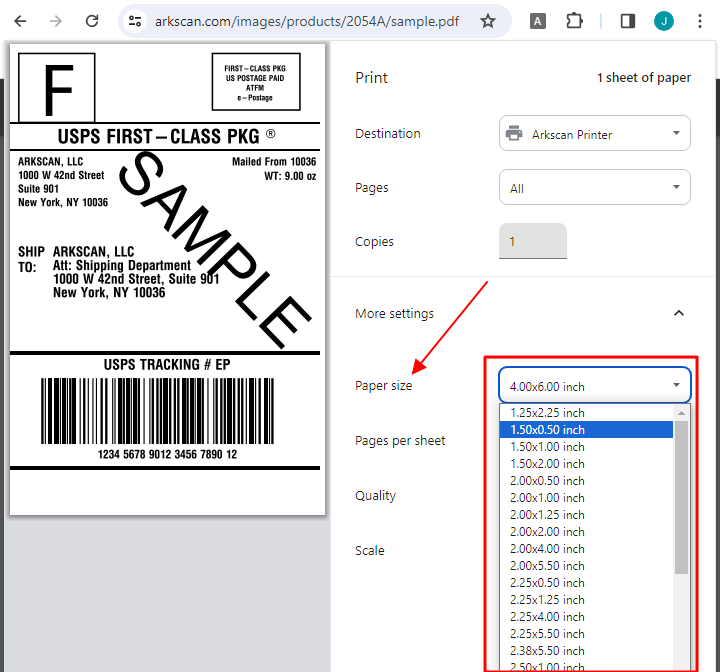
Before you print your label please refer to the recommended settings below as a helpful guide:
- Destination: Select Arkscan Printer
- Paper Size: Select the 'Paper Size' that matches the label that is in the printer
*If the paper size you need is not available, please see the instructions in the FAQ tab on how to create a custom size - Quality:
- All 2054A, 2054K, 2054N - MUST select 203 dpi
- 3044C models - MUST select 300dpi - Scale: Select ' Fit to Printable area'
- Click Print to send label to the printer
01
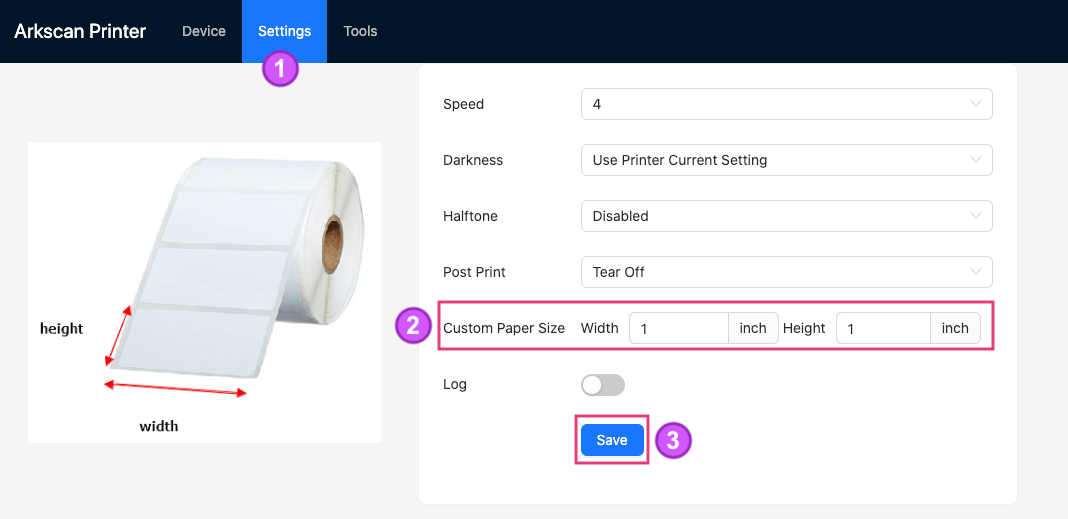
The paper size I need is not listed. How can I create a custom size?
- Select SETTINGS in the Arkscan Printer extension
- In the Custom Paper Size fields, type in the WIDTH and HEIGHT of the label
- Click SAVE
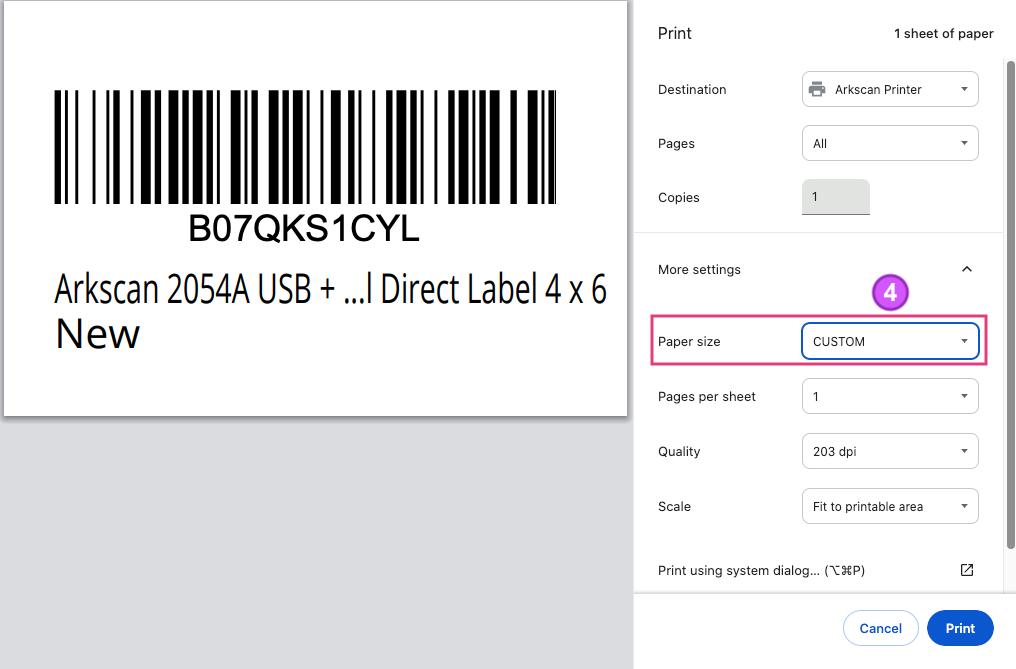
- When printing, select CUSTOM in the Paper Size within the printer dialogue prompt


